Everlock - Installation instructions for camping furniture lock
With a little manual skill and good tools, installing the locks in camping cabinet is straightforward. A suitable drilling template can be downloaded and printed as a PDF document: bohrschablone.pdf
The dimensions of the lock body can be found in this file: Einbausituation-Zeichnung.pdf
Print out the drilling template and make sure that the print setting is set to 100%. To validate, check the control marks on the printout. The distance must be 10cm.
If this dimension is not correct, the hole positions will not fit afterwards!
Required tools:
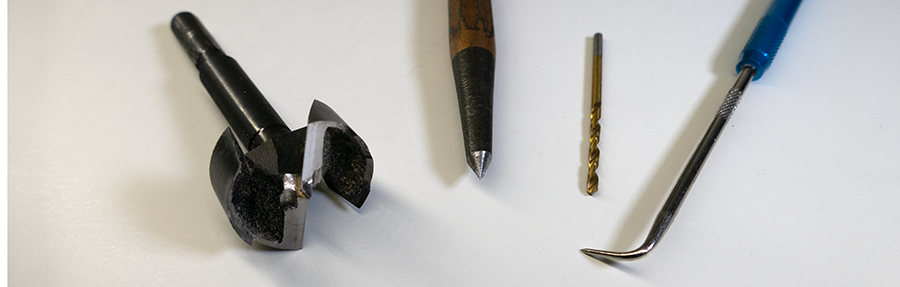
- 30 mm Forstner bit
- Grains / needle / nail for marking
- If necessary, 2 mm drill bit for pre-drilling
- Torx size 10
- Rubber hammer or toggle clamp to press in the cover (+ protective board)
If you are unsure about the assembly, it is recommended to install a sample board on your self-made furniture instead of the real front panel and test the assembly process there. Of course, you must not press the faceplate into your sample board. It can hardly be removed without damage.
Installation steps Everlock stop:
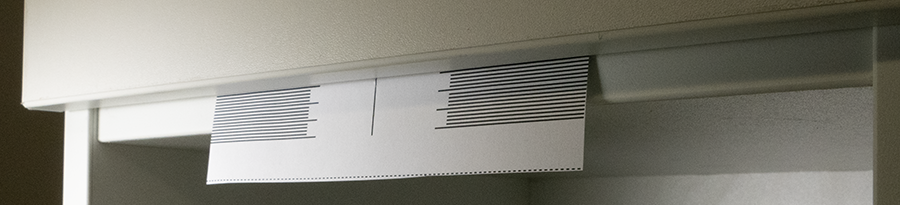
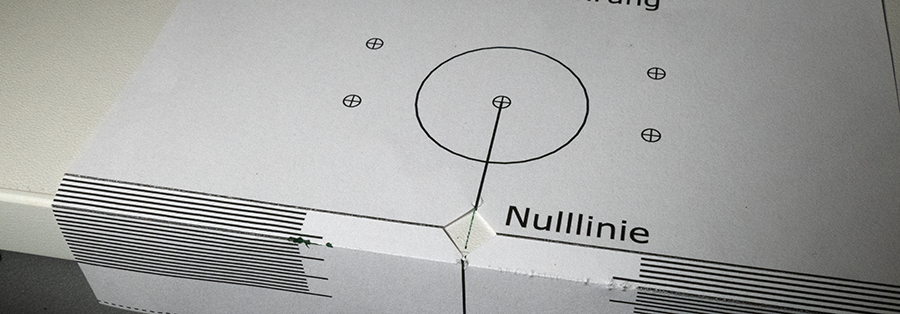
- Is the front panel flush against the stop edge (standard case)? Then fold the drilling template for the stop at the zero line. Otherwise measure the difference and fold according to this difference.
- Cut out the zero point with scissors.

- Mark the center of the front panel etc.
- Align the template on the edge and mark the holes with a punch, nail or pencil.
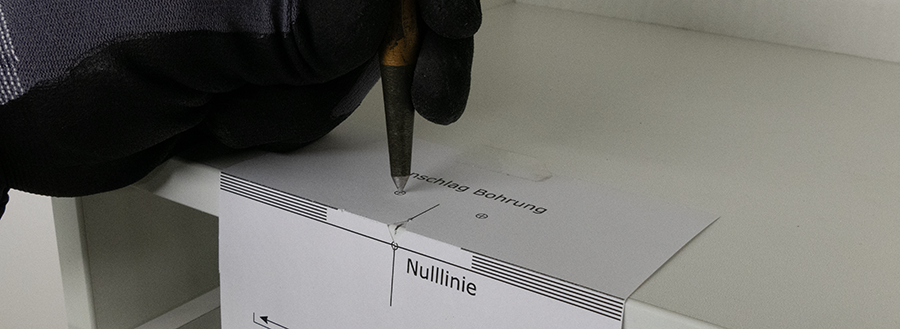
- Depending on the material, pre-drill the holes with a 2 mm drill. Be careful not to drill too deep. To do this, mark the drilling depth on the drill with some adhesive tape.
Installation steps for Everlock lock body:
- Place the second drilling template flush against the face or fix it with a little adhesive tape.
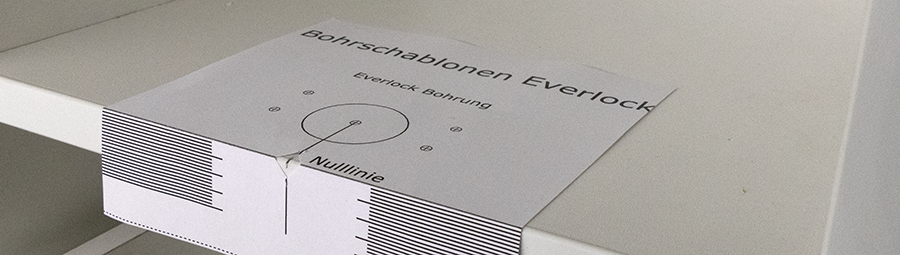
Then close the front panel and read and mark the overlap.
- Remove the front panel. Mark the middle on the visible side.
- Cut out the zero point of the template, align it with the marking, using the previously determined overlap distance.
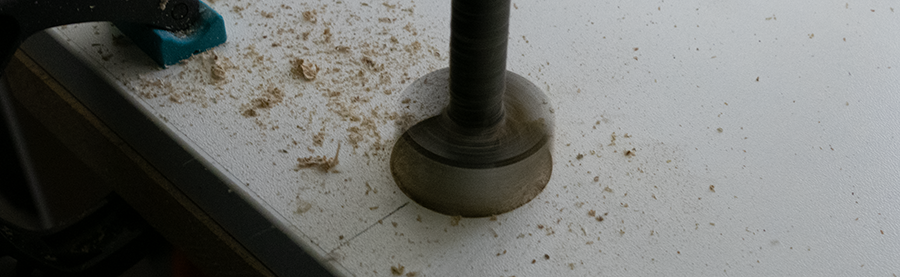
- Mark the 30 mm hole with a punch, nail or pencil.
- Drill 30 mm. Place a sacrificial board under it so that the back does not tear.
- Turn the front panel. Place the template on the inside and align it, mark 4 mounting holes.
- Depending on the material, pre-drill with 2 mm, pay attention to the drilling depth.

- Rework the 30 mm hole with some K80-120 sandpaper.
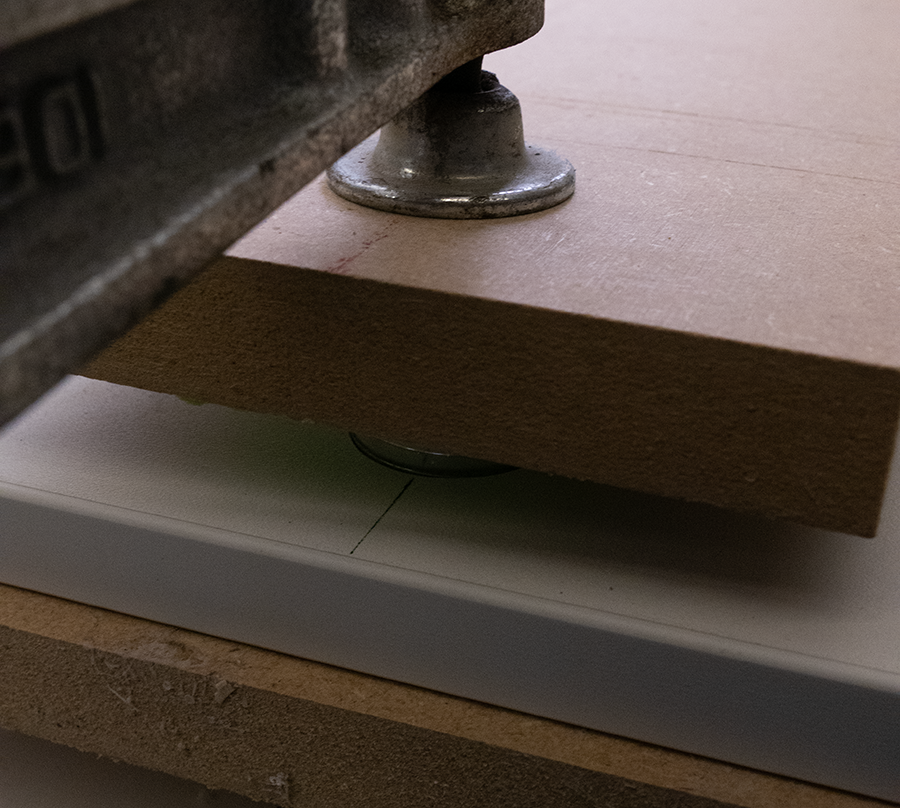
- Place the cover on the front panel from the outside. Put on a clean rag, put on the sacrificial board and carefully drive it in with a rubber mallet. Alternatively, press in with a toggle clamp or similar.
- Turn the front panel and fit the lock body, mount it loosely with 4 screws, align it with the handle hole.
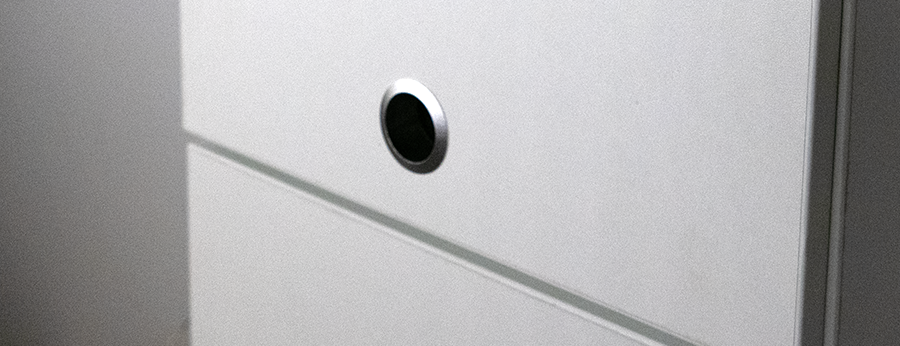
- Mount and close the front panel.
- If the Everlock lock does not click into place, move the stop closer to the lock.
- If the front is loose, push the stop further inwards. As soon as the alignment is correct, firmly screw the stop.
- Check the lock height - the handle should be vertical when closed and the spring force should be felt when it is pressed. If the handle is loose, push the lock a little further away from the stop so that the latch can engage more deeply.
Congratulations, you have installed your first lock. The assembly process can also be used for drawers and doors.
Have fun in the future with your Everlock furniture lock.